RPG Module Flowchart Design: A Complete Guide
Why Every Non-Linear Module Needs a Flowchart
Text describes an adventure sequentially. A GM reads page after page, building a mental model of how the adventure connects. For a linear adventure, this works. For a branching adventure, it fails. The GM reads about Path A, then flips forward to Path B, then flips back to find where they converge, then forward again to the next branch point. The mental model is fragmented.
A flowchart externalizes the mental model. Every connection, every branch, every convergence is visible simultaneously. A GM who studies a well-designed flowchart for two minutes understands the adventure's structure better than a GM who reads the full text without one.
Flowchart Elements
Build your flowchart from these standard elements:
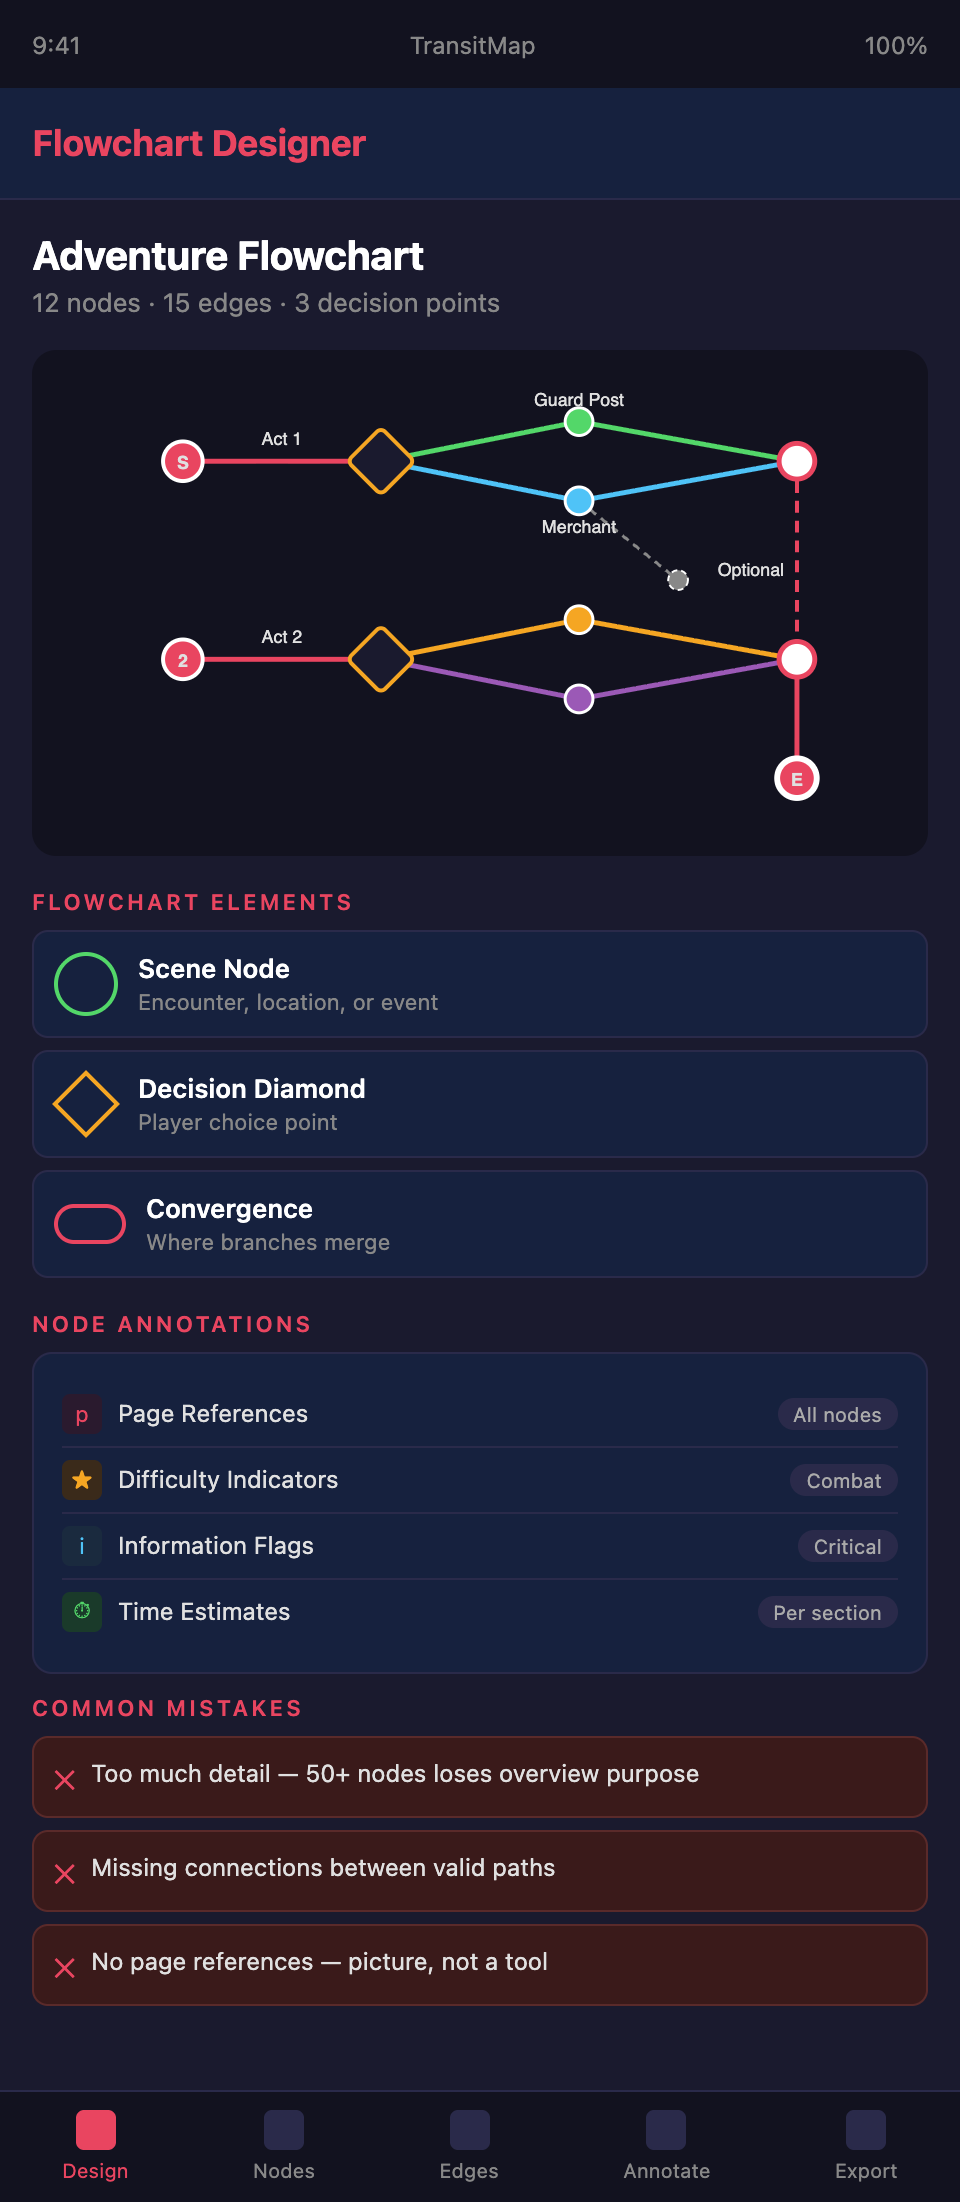
Nodes. Each node represents a scene, encounter, location, or decision point. Nodes should contain a brief label (one to five words) that identifies the content. "Guard Post," "Merchant's Offer," "The Betrayal."
Edges. Lines connecting nodes represent the paths players can take between them. Edges should be labeled when the transition requires a specific action or condition: "Accept offer," "Refuse and fight," "Sneak past."
Decision diamonds. Diamond-shaped nodes indicate points where the players make a choice that determines which path they follow. The choices should be labeled on the outgoing edges.
Convergence points. Nodes where multiple paths merge. These should be visually distinct — a different color, a thicker border, or a larger size — so the GM can quickly identify where branches reconnect.
Start and end nodes. Clearly marked nodes indicating where the adventure begins and where it can end. If the adventure has multiple possible endings, each end node should be distinct.
Optional content. Nodes representing content that can be skipped or that exists as side quests. These should be visually distinct from required content — perhaps dashed borders or a lighter color.
Flowchart Layout Principles
Flow direction. Choose a consistent flow direction — left to right or top to bottom — and maintain it throughout. The GM should be able to scan the flowchart in one direction and understand the adventure's progression.
Minimize crossing lines. When edges cross, the flowchart becomes harder to read. Rearrange nodes to minimize crossings. If crossings are unavoidable, use bridges (small arcs) where one line crosses over another.
Group related content. Nodes that belong to the same location, act, or thematic section should be visually grouped — placed close together, enclosed in a shaded region, or connected by a shared color.
Consistent spacing. Nodes should be evenly spaced. Crowded sections suggest important content and empty sections suggest unimportant content, even when that is not the case.
Readable labels. Labels should be readable at the flowchart's intended print size. A flowchart that requires a magnifying glass fails at its primary purpose.
Flowchart Levels of Detail
Consider creating multiple flowcharts at different levels of detail:
The overview flowchart. Shows the adventure's major sections and how they connect. Five to ten nodes maximum. This gives the GM the big-picture structure in seconds.
The detailed flowchart. Shows every scene, encounter, and decision point. This is the primary reference during prep. It may span a full page or more.
The location flowchart. For adventures set in a complex location (a dungeon, a city, a ship), a flowchart showing how rooms or areas connect. This supplements the map by showing narrative connections rather than just physical connections.
Annotating Flowcharts
Add annotations that increase the flowchart's utility:
Page references. Each node should include the page number where the full content can be found. This turns the flowchart into a navigation tool.
Difficulty indicators. Mark nodes with difficulty indicators — color coding for combat difficulty, icons for trap presence, or labels for challenge level.
Information flags. Mark nodes where critical information is revealed. This helps the GM ensure players receive key information regardless of their path.
Time estimates. Note expected play time for each section. This helps the GM pace the adventure across sessions.
Creating Flowcharts
By hand. Sketch flowcharts during the design phase to visualize adventure structure before writing. Hand-drawn flowcharts work for internal planning but should be recreated digitally for publication.
Digital tools. Use diagramming software for publication-quality flowcharts. Common options include draw.io, Lucidchart, Miro, or Figma. Choose a tool that exports to formats compatible with your publishing workflow.
Consistency with text. The flowchart must match the text exactly. When you revise the adventure, update the flowchart simultaneously. A flowchart that contradicts the text is worse than no flowchart at all.
Common Flowchart Mistakes
Too much detail. A flowchart with fifty nodes loses its purpose — the GM cannot grasp the structure at a glance. If your adventure is that complex, use multiple flowcharts at different detail levels.
Missing connections. Forgetting to include a valid path between nodes. If the players can go from Scene A to Scene C without going through Scene B, that connection must appear on the flowchart.
Unclear decision points. Decision diamonds without labeled options. The GM should see exactly what choices lead to which branches.
No page references. A flowchart without page references is a picture. A flowchart with page references is a tool.
Designing a complex module and need a clear flowchart? Join the TransitMap waitlist — build your adventure's flowchart as an interactive transit map with automatic page references, difficulty indicators, and information tracking across every path.